Preparing hives for winter: the autumn checklist
A colony's winter is mostly decided before winter starts. Eight jobs in the order they fall, from the late-summer varroa treatment and the queen check to stores, entrances, mouse guards, damp and wind, and the notes that tell you which hives to check first in a cold snap.
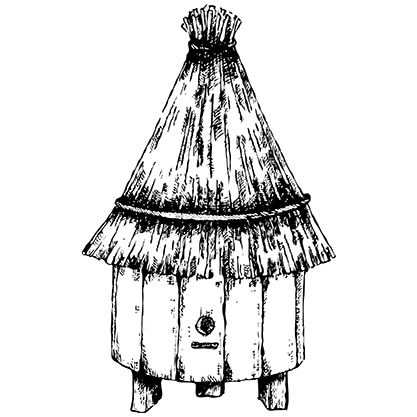
A colony's winter is mostly decided before winter starts. The bees that will carry the cluster to spring are raised in late summer, the stores they live on are laid in during autumn, and the things that kill colonies between December and March, mites, starvation, damp, mice and a failing queen, are all visible or preventable in the weeks before. This checklist follows the order the jobs fall in: the first two in late summer, the rest through autumn.
1. Treat varroa before the winter bees are raised
The biggest single cause of winter losses is a mite load that was allowed to peak in late summer. Treat as soon as the honey comes off, and count mites before and after, so the long-lived winter bees are raised in a colony that is already clean. Why late summer beats autumn explains the timing.
2. Check the queen and the colony's strength
Look for eggs and a compact brood pattern while there is still brood to see. A colony without a laying queen in September will not raise winter bees, and a colony covering only a few frames going into a hard winter struggles to keep its cluster warm. Combine a weak or queenless colony with a strong one now. One strong colony comes through where two weak ones often both fail, and you can split again in spring.
3. Heft the hive and feed what is missing
Lift the back of the hive a few centimetres by its handhold and feel the weight; after a few hives you will know a light one at once. How much a colony needs depends on your climate, from around ten kilos in a mild winter to thirty or more where winter is long and hard, and how much honey bees need for winter gives the figures and how to judge them. Feed thick 2:1 syrup early enough that the bees can take it down, dry it and cap it while the days are still warm; how to mix and feed sugar syrup covers the rest. Once it is too cold for syrup, fondant goes directly over the cluster.
4. Reduce the entrance and fit a mouse guard
A narrow entrance is easier to defend against wasps and robbing bees in early autumn, when the forage has dried up and both are hunting for honey. Before the first frosts, fit a mouse guard: a strip of metal with holes large enough for bees and too small for mice, which otherwise move into the warm bottom box and chew through the comb.
5. Keep the hive dry
Bees survive cold far better than damp. A winter cluster releases a lot of water vapour, and if it condenses on a cold ceiling it drips back onto the bees. Insulation above the crown board keeps the ceiling warmer than the walls, so condensation forms at the sides instead; a small ventilation gap or an open mesh floor lets the moisture out. Tilt the hive very slightly forward so rain runs out of the entrance, and make sure the roof sheds water.
6. Secure it against wind and animals
Strap the hive together or put a heavy stone on the roof: a winter storm that lifts a roof or tips a hive over kills the colony in a night. Where woodpeckers dig into hives in cold weather, a sleeve of netting keeps them off the walls. A stand that raises the hive off the ground keeps out damp and makes the entrance harder for animals that eat bees to reach.
7. Remove what the bees cannot use
Take off empty supers so the colony has no extra space to heat. Remove the queen excluder too: a cluster moving up onto its stores in midwinter can leave the queen stranded below it. In a brood box with more frames than the bees cover, a dummy board narrows the space further.
8. Record it, then leave them alone
For each hive, write down the stores estimate, the treatment and its date, whether a laying queen was confirmed, and the frames of bees. Those notes are the list of hives to check first in a cold snap and the baseline for the first inspection of the year. After that, the best thing for most colonies is to be left closed: heft them now and then, look at the entrance on mild days, give the broodless oxalic acid dose in early winter, and wait for spring.
In the southern hemisphere
The same list applies six months later: treat and check queens in February and March, feed and close up through April and May, and give the broodless treatment in June or July. The beekeeping schedule sets out the whole year month by month for both hemispheres.
Common questions
When should I start preparing hives for winter?
In late summer, as soon as the honey comes off, because that is when the varroa treatment has to happen and when the colony starts raising its winter bees. In the northern hemisphere that means August and September, with feeding finished by early October in most temperate areas; in the southern hemisphere, February to April.
Should I insulate my beehive for winter?
In cold climates, insulation above the crown board helps most, because heat is lost upwards and condensation forms on a cold ceiling and drips onto the cluster. Wrapping the sides matters less and can trap moisture if the hive cannot breathe. In mild, wet climates a roof that sheds rain and some ventilation matter more than insulation.
Do bees need ventilation in winter?
They need to get rid of moisture more than they need air moving through the hive. A winter cluster gives off a lot of water vapour; if it condenses above the bees and drips back, the colony is chilled. A small upper ventilation gap or an open mesh floor, with insulation above, keeps the hive dry without draughts.
Should I open my hive in winter?
Not unless you have to. Opening a hive in cold weather breaks the heat of the cluster. Heft it to check the stores, watch the entrance on a mild day, and if it is light, slide fondant over the cluster quickly. A full inspection waits for spring.
« All posts